
The background of this area should be an image. Please use Change Background feature to change the background of this area.
(Can be found under DESIGN tab)
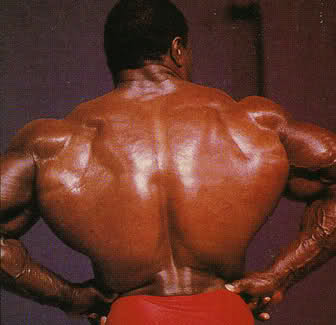
Well, maybe, if you take advantage of my offer at the bottom of this article. Read on. For many years I have beaten up my body from lifting very heavy weights and climbing mountains (more than 2,000,000 feet of ascent and descent). Over the years I have gotten many massages from numerous massage therapist. They are helpful, but there are downsides:
What's the Alternative? Inexpensive, no travel, and anytime you want. Over the years I have bought and used many different massage equipment. They are good, but they have downsides and are not real effective. Recently I heard about a hardcore foam roller. They are very different than the normal foam rollers and in my opinion come as close as possible to a real massage therapist. 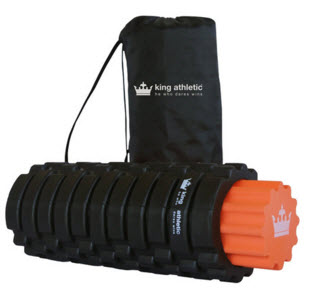 The foam roller from King Athletic is different than traditional foam rollers. It's made of hard plastic with three different surface designs. Each design provides a different amount of pressure that you control. This foam roller is on steroids compare to normal foam rollers.
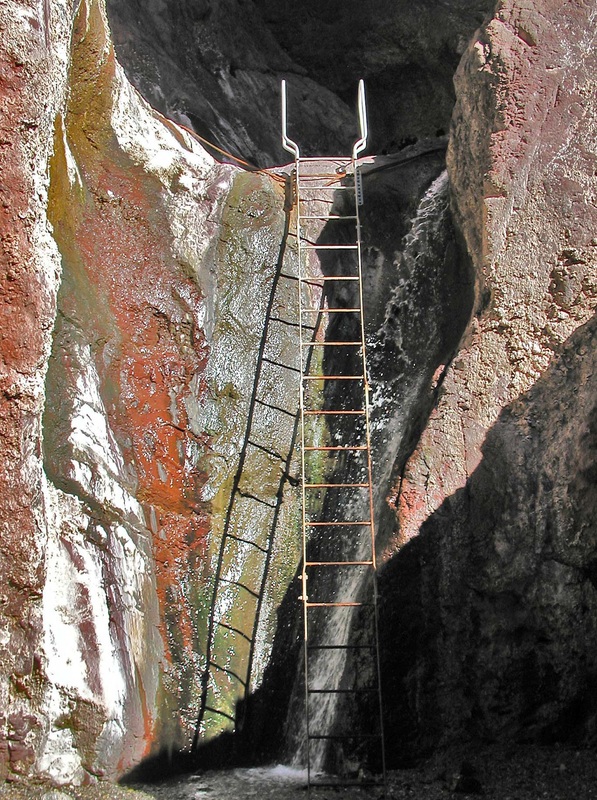
Not only do you get the hard plastic foam roller, but you get a soft foam roller for really sore or tender muscles. If you travel the foam rollers come with a carrying case and the soft foam roller fits inside the hard plastic foam roller. Brilliant! You can use the roller on your back (upper and lower), hamstrings, quads, calves, and chest. My Results Over the past 10 weeks I have lost over 25 pounds, yet my strength has gone up! How? I believe the foam roller has made my muscles looser, which in turn has allowed me to gain strength. I have also noticed a big difference in my back. It's much looser. I am stronger and more flexible! That has helped my mountain climbing. I only spend about 20 minutes a day using the foam roller: two 10 minutes sessions. Once after my workout and the other session at night. Product Details: Only 13" in length Lifetime Guarantee No batteries or cords Great deal: I have a special code good through 12/31 to get 25% off. Here's the code: BOXINGDAY25 More info and to order: Click here. (This is a much better deal than Amazon!) Want the foam roller for free? Buy a lifetime membership to my website (Hiking Las Vegas) and I will send you a brand new foam roller for free. I will pay for everything: the foam roller and the shipping. If you have ever rock scrambled, you know how much fun it is. Red Rock Canyon is the Mecca for rock scrambling. Below are four tips that will help you become a better rock scrambler. If you want to hike to the peaks in Red Rock, you will need to be comfortable on class 3 and 4 rock. Gaining proficiency at rock scrambling is the best way. 1. Confidence This is the biggest key. You have to believe you can climb the obstacle facing you. Let me tell you a story that will help you understand. Several years ago Davis and I were looking for a new route to Bridge Point. The old route traveled deep into Fern Canyon. We thought we could find a route that left the wash much sooner. We found a route that departed the wash just after the seasonal waterfall. Our plan was to make a direct ascent for the gully that sits below the peak. Once out of the wash we headed NE toward an imposing wall. We soon found several ledges that traversed the wall. Many of the ledges were dead ends, but finally we found a ledge that went across. It was airy; a fall would be fatal. There was an awkward move to get off the ledge and onto safe ground that involved stepping onto a scrub oak tree. Shortly after the traverse, we met up with the original route and the rest was history. This new route saves almost 30 minutes compared to the original route! I was excited and wanted to show friends the new route. A few days later, Hiking Dave and Doyle met me at Red Rock. They had both hiked Bridge Point several times. As we approached the ledges, they looked at me like I was crazy. They decided to try and find another way and I took off to traverse the ledges. As I started the traverse, it seemed much more difficult than the other day with Davis. It was getting thin and I knew a fall would be deadly. I continued to traverse knowing that I could do it; I had just done it a few days earlier. As I was hugging the wall one of my handholds broke. Yikes! I wasn’t putting any weight on it, so I was okay. I kept creeping toward the end of the ledge where I knew the scrub oak tree would be my exit to safety. When I got to the end of the traverse, there was no scrub oak tree! I was on the wrong ledge! Looking back I should have fallen. That traverse was crazy, but I was so confident, because I had just done it the other day, even though I really hadn’t! Funny how my confidence was based on the wrong information, but that did not matter. This is what I mean when I write you have to believe you can do it. 2. The Right Stuff = The Right Shoes This tip will improve your rock scrambling by 25% immediately! You need to wear the correct shoes. What are the correct shoes? You got to have some sole! You want shoes that have sticky rubber soles. These type of shoes are often called approach shoes in catalogs and on websites. There are at least three types of sticky rubber soles: Stealth Rubber, Frixion, and Gryptonite. All are very good. Different manufactures favor one type over the other. You can’t go wrong with shoes made from these types of rubber. It’s really a personal preference and how they fit. You won’t believe how you will stick to the rock and that will give you more confidence. Currently (2015), most of us are wearing the Five-Ten brand of shoes. 3. Confidence Builders I call this technique: Practice without Consequences. Start doing very tricky moves only inches from the ground. If you fall, you will not get hurt. This is the best way to get good at traversing. Since traverses don’t ascend, choose a traverse that’s only inches from the ground. Most hikers find they need work when it comes to traversing. This is a great way of getting good. Many of the routes to the peaks involve traverses. You can try rock climbing gyms. I never really liked them, because I felt the holds did not feel real. I have never used chalk outdoors, but in the gyms I can’t stay on anything without chalk. A better idea is to do some top roping with an experienced rock climber. Top roping is much safer than traditional rock climbing and you get to climb a lot more. Once you are a 100 feet off the ground on small holds, 4th class rock will seem easy. This is how I became comfortable on class 4 rock. 4. It's All a Balancing Act Good balance can save your life. It has saved mine! You need to work on your balance. I use a Bosu at the gym. Most gyms have them. If not or if you don’t go to a gym, you can buy one. However, they are expensive ($100+). A Bosu ball has two sides. The blue side is soft and round; the black side is hard and flat. You can work with both sides. Here’s my routine (blue side up): First, I gently place one foot in the center of the ball and balance until I feel completely comfortable and hold for 15 seconds or longer. I then repeat with the other foot. Second, I walk toward the ball and jump on it with one foot. I am off balance at first and have to get my balance quickly or I will fall. I take it up a notch by jumping onto the ball from a brisk walk. Third, once on the ball and balanced, I hop onto my other foot. Hold for a few seconds and hop again. Now for the hard part: I take the ball and place it at the edge of Rainbow Wall... just kidding. Now I turn the ball over so the blue (round side) is down and the black side is up. Fourth: I gently place one foot in the center of the ball and balance until I feel completely comfortable and hold for 15 seconds or longer. I then repeat with the other foot. Note: I wear my scrambling shoes when I do this routine and so should you. Below is a video of this routine. This routine has really helped me regain my balance. Last winter (2009) I overstretched my hip flexor leaving my balance in question. Since doing this routine my balance has returned and has gotten better. I hope you find this article useful. If you are not a member of my website, please take a look at everything you get. See you in the mountains. 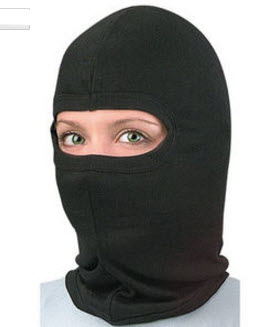 Balaclava Balaclava I used to say dress for the season (Spring, Summer, Autumn or Winter). After following the weather for many years, I have changed to: Dress for the forecast. Here's an example why I changed my thinking. One thinks May in Las Vegas means warm temps, say in the mid-eighties. In a span of eight days the temps ranged from 96 degrees to 60 degrees! Those temps are both daytime highs.
When it's 96 degrees, you want to wear cotton to keep cool. Cotton retains water (your perspiration) which has a cooling affect. Conversely, when it's cool out, you wear clothing that keeps you warm. Clothing helps you stay dry and comfortable. How do you prevent becoming chilled? Wear layers of clothing. The secret to layering is combining the correct clothing in the proper order. Done correctly it traps air warmed by your body heat while wicking moisture away from your skin. The first layer (the one closest to your skin) will wick moisture away from your skin while trapping body heat. Any of the wicking fabrics found under the trade names Thermax or Coolmax work well. They come in different thickness. The colder the climate, the thicker the material you will want. The middle layer acts as insulation. Fleece sweats, polypro pullovers, or a long-sleeved flannel shirt are good choices. The middle layer can be more than one garment. The final layer protects from wind. A windbreaker is fine in Las Vegas, except during winter months in Mt. Charleston. Jackets made from GORE-TEX are recommended during winter. When it's cold, don't forget gloves and hats. I mean warm gloves, not the rubber latex gloves for handlining up ropes or webbing. If you come to a serious climb, you will have to take your gloves off for a better grip on the rock. I am not talking baseball hats, either. I mean a balaclava. They are available in different thicknesses and really keep your head and face warm. There are plenty of good websites to check for the forecast. Here are two I use: Weather.com and Noaa Note: Both links are set to Las Vegas. NV. You can easily change the setting to your home town.
Quick Tips
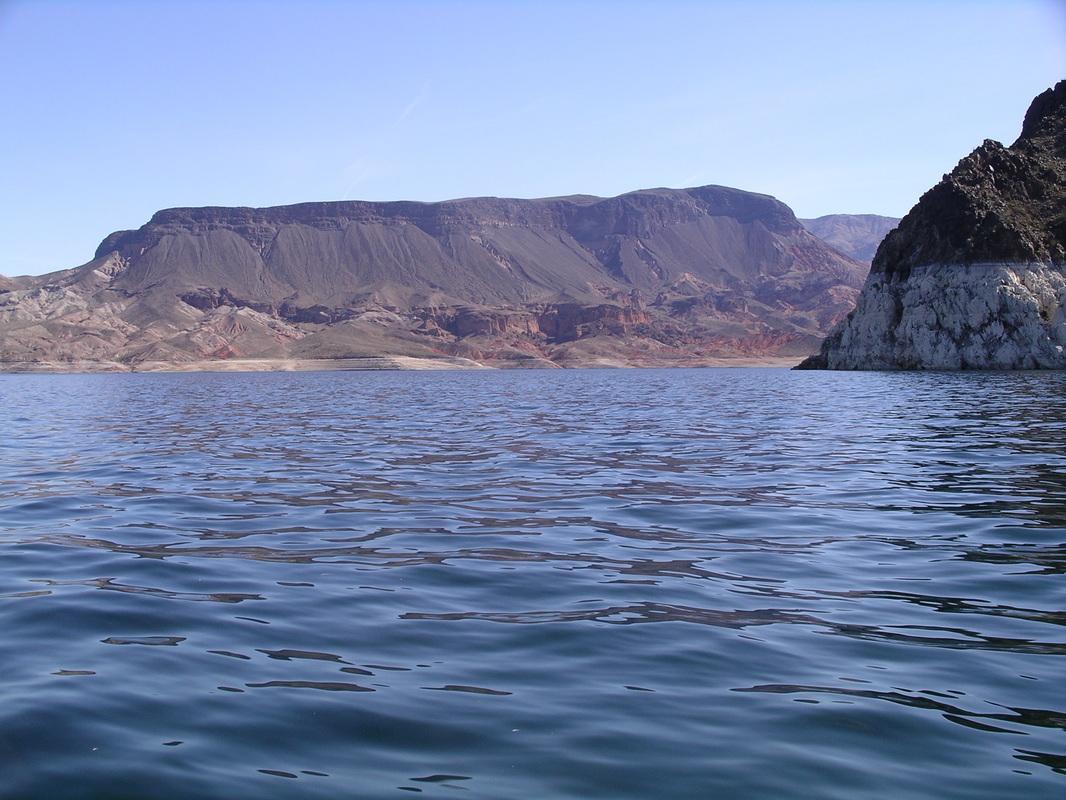
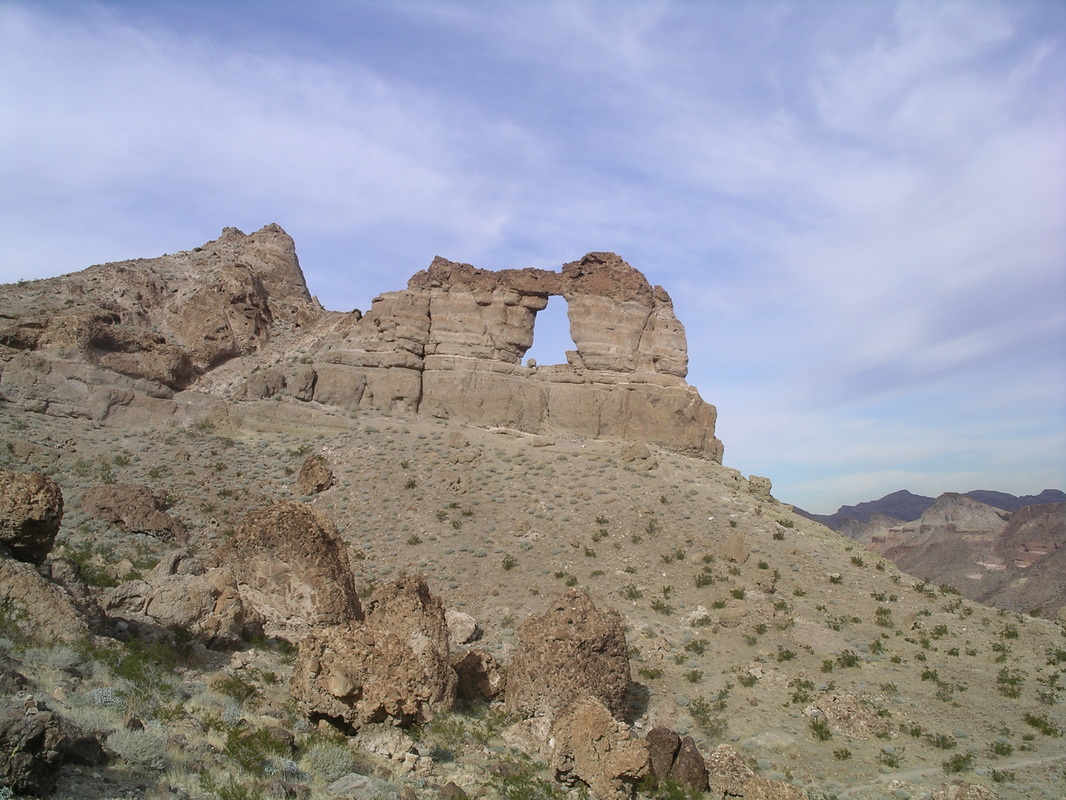
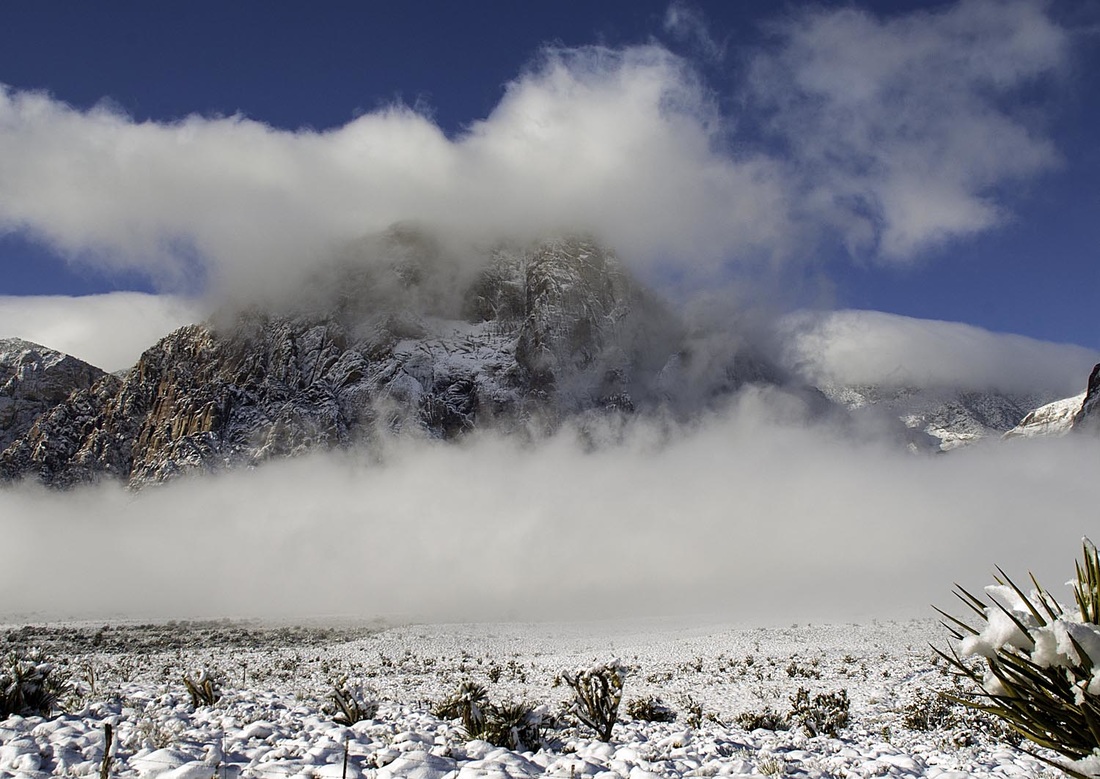
Alternative Hiking AreasLuckily, we have some alternatives. Lake Mead has hotsprings and peaks people can hike. Arizona Hotsprings is a local favorite. Northshore Peak and Fortification Hill are fun hikes. Death Valley is less than two hours away from Las Vegas and offers very different and very scenic hikes. Manly Beacon is one of the most unique hikes in the country! China Date Ranch is only 90 minutes from Vegas and features Death Valley type hiking. Fence Post Peak might be the craziest hike you will ever do! After the hike, you can enjoy a Date Shake. And the good news is: All of these hikes are led by the 52 Peak Club! Not into group hiking? Cool. Become a member of this website and download the above hikes and another 395 hikes.  Ted Williams Ted Williams Meet Ted Williams. He's 77 years young, has done all 52 Peaks in the 52 Peak Club and leads hikes for the 52 Peak Club. I had the pleasure to hike with Ted this week and watched him climb to the top of Hollow Rock Peak. Instead of writing about Ted, I made a short video about him. I think you will find the video both amazing and educational. Ted also figured out how much elevation is gain when a person hikes all 52 Peaks of the 52 Peak Club. It comes out to 120,000 feet! That's over 6,000 flights of stairs! Here's Ted's 53er page: Click here Overall Las Vegas has mild weather and that's one reason a lot of people moved to Vegas. We have more sunny days than most other cities, no tornadoes, and obviously no hurricanes. However, the mountains around Las Vegas have their own weather. We will look at these factors so you can dress appropriately when you go hiking. We will also look at the best weather resources on the internet and you will read some interesting and surprising weather facts. Weather Resources I use three different internet sites to check the forecast: Weather.com - good for a quick overview, especially the next 10 days. I like the layout of their page the best. National Weather Service - you can pinpoint an exact location with their interactive map. For example, you can check the temperature and forecast for the summit of Mummy Mtn. Weather Underground - has the forecast for Red Rock Canyon, including wind speed, chance of rain, and humidity. (note: the link I provided is for Red Rock Canyon. You can change it to another location.) 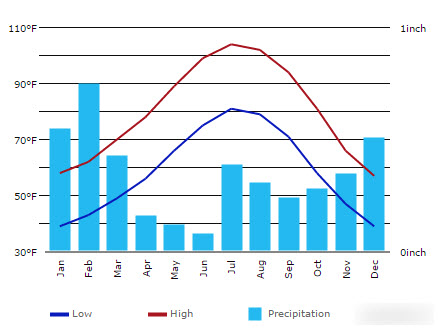 Weather Facts for Vegas and the Mountains:
Usually the forecast does not vary too much within 48 hours. Meaning if there's a 50% chance of rain forecast on Wednesday for Friday, it probably will not change. However predicting the weather is not an exact science. As an example as I write this on Tuesday there was an 80% chance of rain on Friday. It dropped to 20% Wednesday and now (Thursday) it's went up to 40%. When you see this, all bets are off. For every 1,000 feet you ascend, the temperature drops four degrees. This is very important as you will read later in the article. It does not rain as much as the predictions. The mountains can create their own weather. This is more true of Mt. Charleston than Red Rock. While lightening is a real concern in Mt. Charleston, it's uncommon in Red Rock Canyon. The Monsoon season is characterized by violent thunderstorms that occur in the mountains. Around Las Vegas we are talking about Mt. Charleston. The Monsoon season normally does not start until mid to late July and last through August. The hottest month of the year is July, not August. (Average: 104 degrees) The coldest month is December (Average: 57 degrees) Coldest day ever recorded: 8 degrees Jan 13, 1963 Hottest day ever recorded: 117 degrees July 24th, 1942 and July 19th, 2005 The average temperature in September is mid 90's. Annual rainfall for Las Vegas: 4.19 inches per year. Days per year with precipitation: 21 Weather and Hiking Here are some rules I follow:
How can you hike in Red Rock when the forecast is 110 degrees? It will not be 110 degrees in Red Rock. Why? First, that 110 degrees is for Las Vegas (elevation 2,200 feet) at 5 pm. If you start hiking at 6 am in Red Rock it will not be close to 110 degrees. It's the coolest in the morning. Second, the temperature drops four degrees for every 1,000 gain in elevation. Red Rock starts around 4,000 feet, so it's eight degrees cooler. Hike to a 6,000+ foot peak and it's 16 degrees cooler than Vegas. Example: You are at a 6,000 foot peak at noon. It's 100 degrees in Vegas. You are roughly 4000 feet above Vegas. 4 x 4 = 16 degrees cooler, meaning it's only 84 degrees at the peak. That sounds a lot better than 110 degrees. Another tip is to hike routes that have a lot of shade. Two that come to mind are Oak Creek Overlook and Kraft Mtn., the West Face route. This latter route is entirely in the shade if you start around 6 am. Hope this helps you have a better hike. If you have some weather tips, post them. I have led groups on hundreds of hikes over the past 18 years with very few incidents. I always stress safety first. We do some pretty extreme hikes and you would think the number one danger would be someone falling, it isn’t. Watch the video. The video shows how dangerous rock fall can be in the mountains. Imagine if that rock hit you! It would bust a rib, break a leg or, if it hit you in your head… let’s not think about that.
How To Avoid Rock Fall The obvious answer is to hike only on trails. Since there are only two peaks that have official trails to them in Mt. Charleston (Charleston Peak and Cathedral Rock), that’s not practical for peak baggers. Red Rock has one peak that has an official trail to the summit: Turtlehead and it’s impossible to follow the trail. I have hiked all over the southwestern United States and Mt. Charleston has some of the loosest rock I have ever hiked. We can’t change that, but we can decrease the odds of getting hurt. The greatest danger is on the descent. During the descent hikers become tired and they do not pay attention. They accidentally dislodge a rock hurling it down the slope sometimes hundreds of yards. You do not want to be 100 feet below a hiker who dislodges a rock. Rules to Keep You Safe:
The Rock Has Your Name On It! It’s a sick feeling watching a rock coming at you. Unfortunately, I know from experience. If there’s enough time hide around a wall or behind a tree. I realize this is not possible most of the time. Stay quick on your feet and be ready to jump out of the way. Don’t assume the rock will not hit you if it’s 30 feet to your left or right. I have seen rocks take some crazy bounces. If you can’t get out of the way, try to deflect the rock with your hands. If it’s coming for your head, duck or cover your face. Rock fall is part of mountaineering and that’s what you are really doing when you follow routes, not trails, to the summits in Mt. Charleston. It’s a risk you have to accept if you want to climb most of the peaks in Mt. Charleston or the Sierra. There are many ways to improve your hiking; stretching after a hike is one of them. Why stretch? Stretching is a fundamental method that improves your overall health and fitness. Stretching improves:
Hiking and Stretching Unlike most physical activities, which last an hour or so, hiking can last up to eight hours or more. You put your body through a lot of stress and your muscles tighten. This is especially true if you are rock scrambling to a peak. Think of all the ways you contort your body on hikes like Holiday Peak or Turtlehead Jr., the Double Slot route. After the hike we do the worst thing: we sit in a car. Sitting is not good. It's almost the opposite of stretching. Stretching is especially beneficial if you are older or it's cold outside. We need to keep our muscles and joints flexible. It will improve our hiking and mornings will feel better. Some of you know that feeling of getting out of bed in the morning. I also believe it tightens your muscles if you sleep for more than six hours continuously. When to Stretch? For me it's easiest to stretch immediately after the hike. I drive to the gym, take a shower, go into the Jacuzzi, then stretch. I believe the Jacuzzi helps loosen my muscles. By going to the gym right after the hike, I can't blow it off. You know how once your at home it's hard to go back out again. If you stretch in the morning or before you are warm, do gentle stretches. Why? It's much easier to pull a muscle when your muscles are not warmed up. How to Stretch Which stretches you do is really dependent on where you are tight. If you do a lot of hiking or rock scrambling, your quads, hamstrings, gluts and calves are probably tight. If you go to a gym, they probably have lots of stretching machines. Some important principles to follow are:
Besides the normal stretches you can use foam rollers. They are actually more of a massage technique than a stretch and they are very effective to relieve muscle soreness and trigger points. I stretch everyday regardless if I hike. I also stretch a few times a day. Give it a try. I think you will feel better and enjoy hiking more. |
AuthorBranch Whitney is the author of Hiking Las Vegas and creator of the 52 Peak Club where members hike to the best 52 Peaks around Las Vegas, NV Archives
October 2023
Categories |

 RSS Feed