The background of this area should be an image. Please use Change Background feature to change the background of this area.
(Can be found under DESIGN tab)
Hiking Las Vegas Blog
|
“When is it better to go hiking? How to prepare for it? What to wear when hiking?” – questions like these are asked by first-time hikers most often. At first glance it might seem that a walking trip doesn’t require any special clothing; however, only thorough preparation will guarantee an unforgettable and safe hiking experience. The thing is the weather can rapidly change from hot to cold, from wet to sunny, regardless of the season, especially if choosing mountain routes and trails. That’s why the hiking outfit is meant to be super versatile, comfortable, and ready-for-everything. Best Fabrics To ChooseThe main criterion that should be followed here is the moisture-wicking ability of the fabric, no matter if it’s hiking tights or a long-sleeve shirt. Synthetic materials handle it very well: polyester is known over time as a universal and affordable fabric, able to wick sweat and dry fast. Its only downside is a tendency to smell funky – the problem, which can be solved by means of natural materials like merino wool (so popular among tourists). Exceptionally lightweight, soft, odor-free, and breathable, it keeps you cool in temperatures of up to +35°C, and holds in the heat in -20°C. 21 things you should know before investing in wool. Nowadays, lots of hikers also pick such innovative material as GORE-TEX, characterized by incredible longevity and waterproof/windproof protection. Avoid cotton: despite being natural, it’s absolutely inefficient at wicking and drying. It soaks up the sweat and stays wet for a long time. “Cotton kills” – the longtime hikers claim, and that makes sense, indeed. Layering is the KeyIs it really an issue? Absolutely! Three layers of clothing – basic, insulating, and shell – will trap the air warmed by your body heat, wick moisture away from your skin, allow you to adapt to changing weather condition, without sacrificing durability and comfort. Remove upper layers to prevent yourself from overheating, or add layers if it’s cold. Besides, you’ll have extra space in the backpack as a little pleasant bonus. Base LayerThe layer, which is closest to your skin, is meant to trap the body heat and wick moisture. So, all wicking fabrics like COOLMAX will cope with it. Choose the thickness according to the climate, season, weather, and enjoy your adventure. Nylon, polyester, and merino wool are also good in keeping you clean, cool, and dry, so they’re perfect for:
Middle (Insulating) LayerThe second layer acts as insulation, it’s usually more than one garment. It may include a long-sleeved flannel shirt that you can take off or roll the sleeves up, a polypro pullover, polyester fleece pants, a pair of ordinary sweats, or the one able to transform from pants to shorts. Never wear denim jeans for a hike, avoid pants with tight waists and if they’re not stretchy enough to climb up steps or over rocks. Shell LayerHere goes the clothing that protects from wind and rain. Waterproof or water-resistant (less expensive) jackets with removable fleece interior for increased versatility can double as a windbreaker. Choose lightweight yet sturdy materials, so that it blocks the wind well while packing it isn’t a hassle. Also, remember to take waterproof pants as well, when the rain is predicted by the weather forecast. The wider, the better – if you can get the pants on without taking the boots off, it’s a big plus in case of a sudden downpour. Hiking BootsShoes are the most important part of the hiking outfit, as you are going to go big distances on foot, and blisters will quickly disable even a highly experienced tourist. Sneakers won’t give you the grip you need on slippery surfaces, so better wear special hiking shoes or boots. They are both comfortable and safe and can cope with any terrain. The best shoes for hiking have a good sole, provide you with plenty of ankle support, stability, and flexibility. For warm weather, don’t put on waterproof shoes as they feature bad breathability that will result in excessive feet sweating. Head & HandsNo matter, if you’re planning a hike in Vegas or somewhere else, in summer or in winter, sunglasses and a hat are definite must-haves. The sun is too active even when it’s cold outside, so without proper protection, you’re risking to get sunburned. Cover your neck, face, tips of the ears, as well as head and eyes.
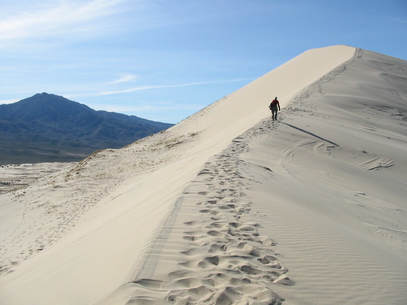
In winter wear a hat in order not to lose heat from your head, or try a balaclava. Waterproof gloves would also come in handy for a cold weather hike. Be adventurous but stay safe, choose comfort over fashion, and you’ll have the most unforgettable hiking experience of the lifetime! Written by Helen Rogers http://thecrossfitshoes.com/ A surprising number of people travel to Las Vegas in order to enjoy some of the beautiful surrounding country. That might seem counterintuitive if you’re used to pictures that make it look like Vegas simply shoots out of a flat landscape in the middle of nowhere. But one need only venture a few miles away from the city to start seeing more varied terrain, and only a little farther to start seeing some true national wonders. Lake Mead is a popular hiking destination for instance, best known for being the site of the Hoover Dam; Red Rock Canyon is a popular draw as well. For the most part, these destinations can almost be considered akin to some of the main attractions of Vegas. Seeking out surrounding national parks, for some visitors, is not unlike trying to find the best restaurants or hunting down the best roulette experiences on casino floors. Just as the legendary casino games and luxurious comforts exemplify the spirit of Vegas, the surrounding natural areas are synonymous with the American Southwest. Even with there being some renowned natural areas around Vegas, however, there are some that are somewhat overlooked. One is the Kelso Dunes, a breathtaking area nestled within the Mojave National Preserve, which is just across the California border from Nevada. Essentially rising out of nowhere in the midst of a vast expanse of dry land, the Kelso Dunes are higher and more striking than most dunes you’ve seen at popular beaches. And naturally, they make for a great hike! To some extent, if you drive to the dunes and bark at an entrance to the park, you can explore the area on your own. However, there are set hikes as well. Hikespeak outlines a three-mile round trip that takes you to the top (about 650 feet over the desert floor, which is actually quite high) and back to where you started. The directions to the trailhead provided there are from the west, assuming a visitor is driving from Barstow. But the coordinates are provided as well, which should make it easy to reach from Las Vegas as well. Once there, you face a straightforward but still relatively challenging hike. Walking on sand always involves a little bit of resistance, and though the climb is gradual, 650 feet on a dune is no joke. Nevertheless, it’s well worth the trip. You’ll get a nice workout, you’ll climb on some of the biggest dunes you’ll ever see in your life, and you’ll enjoy awesome views of the surrounding desert. It’s certainly a nice way to mix it up in the midst of a trip to Las Vegas. On July 4th, 1999, we successfully completed our 4th annual Multi-Peak hike in Mt. Charleston. In the past we had done three peak hikes, but this year we wanted something very challenging. And we got it.
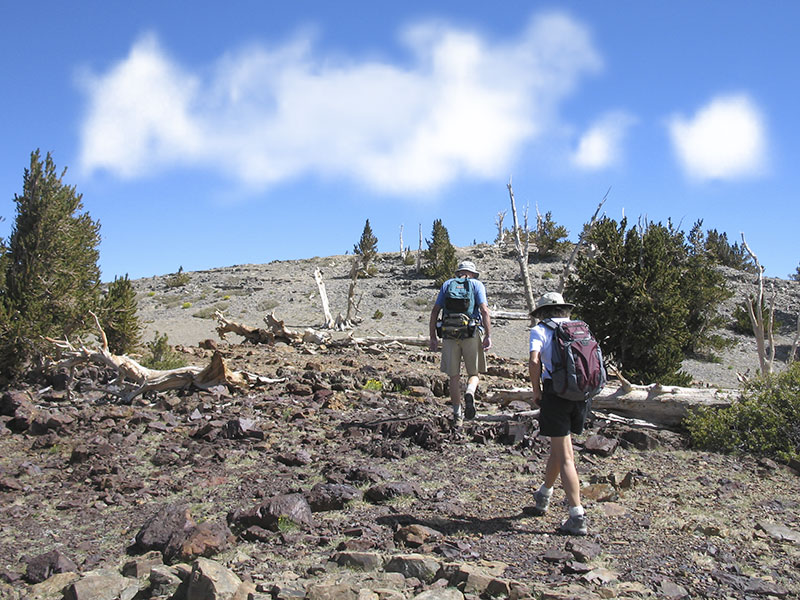
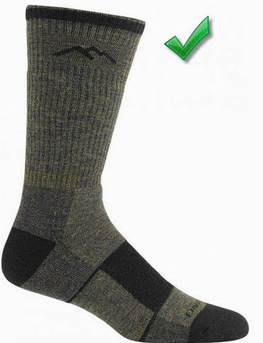
This was our first and only Five Peak endurance hike, at least doing this route. We started at the South Loop trailhead, hiked to Griffith Peak, Charleston Peak, and Mummy Mountain. We then descended the scree slope and followed the North Loop trail back up to Charleston Peak and over to Griffith Peak. Finally, we took the South Loop trail back to the trailhead. I figured we hiked a little more than 28 miles and the elevation gain was almost 7,500 feet. Below are our times for future reference. I don't recommend doing this hike. It was very hard and abusive to the body. We took about 90 minutes for breaks, food, and signing the registers. Start: 5:46 am Griffith Peak: 7:38 am Charleston Peak: 9:33 am Mummy Mtn: 12:16 pm Charleston Peak: 3:31 pm Griffith Peak: 5:51 pm Finish: 7:56 pm Although on this hike we did not camp, long hikes like these require plenty of food. Learn more about the best no cook meals you can take on your next adventure. I received a pair of Darn Tough socks to test back in January 2014. The model I tested was Coolmax Boot Sock Full Cushion #1441. Here was my original finding: Great fit: Darn Tough has eliminated the stitching by the big toe and little toe that can make the sock bunch up. Comfortable: From the minute I put the socks on they fit well and were comfortable. No slipping. Padding: Both under the ball of the foot and in the heal. Wicking materiel: Your feet stay dry,which prevents hot spots and blisters. Made in America: Enough said. Lifetime Guarantee: You read that right! As most of you know the hikes I do are very demanding. I have done about 10 hikes in these socks and I will be a lifetime customer. Update:It has been 3.5 years since I started wearing Darn Tough Socks. Since then they are the only hiking sock I wear.
I was given four pair of Darn Tough socks back in Jan. 2014. I have done almost 400 hikes and all four pair of Darn Tough socks are still in great shape! I will be a lifetime customer. Website: http://darntough.com/ Note: Darn Tough has many models to choose from. |
AuthorBranch Whitney is the author of Hiking Las Vegas and creator of the 52 Peak Club where members hike to the best 52 Peaks around Las Vegas, NV Archives
October 2023
Categories |


 RSS Feed