
The background of this area should be an image. Please use Change Background feature to change the background of this area.
(Can be found under DESIGN tab)
|
The best hiking companions are trekking poles, which inexperienced hikers frequently overlook. They provide stability, ease joint and knee pain, and can even improve your hiking experience in general. Due to the wide variety of alternatives available, picking the finest trekking poles is nothing short of a challenge. You won't need to worry because this manual will give you the necessary information. Material Matters
The longevity and effectiveness of your hiking poles rely on their construction. Al- or C-fiber is the most common material for hiking poles. Aluminum poles are great for novices and users on a tight budget since they are reliable and reasonably priced. They are strong and resilient to pressure. They weigh more, on the other hand. Poles made of carbon fiber are quite light, however. They are preferred by seasoned hikers and those who want to lessen their bags. They absorb shock well,reducing joint stress. However, they cost more and break more easily under extreme stress. Adjustability is Key Choose hiking poles with adjustable lengths if you can. These let you modify the pole's height to suit your requirements and topography. Adjustable poles are extremely helpful when navigating steep ascents or descents where you would prefer shorter or longer poles for improved stability. There are a variety of locking mechanisms for adjustable poles, including twist locks and lever locks.. Twist locks are simple to use and keep up, but they sometimes must be tightened. Lever locks give a solid grasp and are less likely to slide throughout your trek, although they are a little more complicated. Grip Comfort Long treks impact the health of your hands due to the grip of your trekking pole. Rubber, cork, and foam grips are often used. Foam grips are portable and insulated for a variety of weather situations. Cork grips conform to your hand and wick away moisture. Rubber grips are secure yet unpleasant to use, particularly in warm weather. Your preferred grip material should be based on your preferences for comfort and temperature. The ergonomics of the grip are also crucial to take into account; rounded grips prevent blisters and pain. Hiking with trekking poles has a lot of benefits, and a good one will improve your experience, especially in the comfort department. Basket Size and Type Your trekking pole's base has a basket serving several functions. It provides stability by preventing the pole from dunking too far into slush or snow. Additionally, baskets aid in preventing damage to the pole tips. The baskets on trekking poles are normally replaceable and available in different sizes. Larger baskets are preferred for trekking across snowy or difficult terrain. For casual trekking in easier terrain, smaller baskets are ideal. To minimize sinking in snow, some poles even include bigger snow baskets. Make sure the trekking poles you choose have interchangeable baskets for the terrain you want to hike on. Shock Absorption If you want to climb over rough or uneven terrain, shock absorption technology can greatly improve your trekking experience. Many trekking poles include springs or elastomers built into the shaft that act as shock absorbers or anti-shock devices. These characteristics make hiking easier and more pleasant by reducing the force on your wrists and arms. Purchasing poles with shock absorption will greatly increase your overall comfort and endurance if you have a history of joint issues or want to go on long-distance excursions. Weight Considerations For short walks, the weight of your trekking poles is not a huge worry, but as the length and complexity of your treks rise, it becomes more crucial. Poles that are lightweight are very useful for thru-hikers or backpackers who need to reduce the weight of their overall load. The preferred option for lightweight aficionados, carbon fiber poles can be expensive. For hikers wishing to lighten their load without breaking the bank, aluminum poles provide a more affordable choice. Make careful to strike a balance between cost and weight that suits your unique hiking requirements. Conclusion Selecting the best trekking poles requires careful evaluation of the material, adjustability, comfort of the grip, size of the basket, shock absorption, weight, and brand reputation. Each element is essential for improving your hiking experience and guaranteeing your safety on the path. Always keep in mind that the best trekking poles will rely on your individual tastes and hiking objectives, so carefully consider all of your possibilities before making a choice. SOURCES: https://www.switchbacktravel.com/how-to-choose-trekking-poles#:~:text=Choosing%20the%20Right%20Length&text=To%20measure%20your%20size%2C%20hold,will%20indicate%20your%20pole%20length. https://www.outdoorgearlab.com/topics/camping-and-hiking/best-trekking-poles/buying-advice https://www.treelinereview.com/howtochoose/trekking-poles 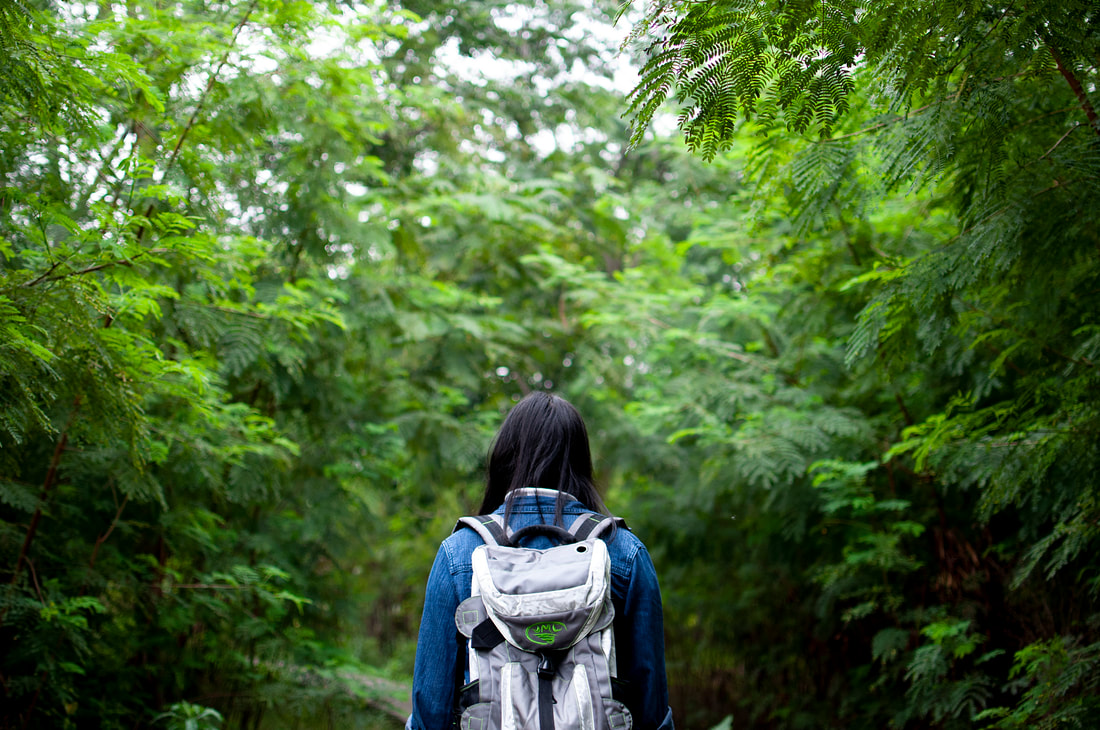 Las Vegas, although well known due to its vibrant nightlife and fantastic casino establishments, has so much more to offer. This includes the exhilarating experience of both hiking and fishing. With its diverse natural landscape, this bustling city provides a unique opportunity to combine the thrill of hiking through breathtaking trails with the excitement of fishing in serene waters. This article will explore the perfect blend of these activities in Las Vegas, focusing on buying the right gear and appropriate safety issues to make the most of your outdoor adventures. Understanding the Essential Fishing Gear
Having the right gear is crucial before embarking on hiking and fishing escapades in Las Vegas. Here are some essential pieces to consider: Fishing Rod and Reel: Selecting a rod and reel suitable for hiking requires careful consideration of weight, portability, and durability. Look for lightweight, compact options that won't weigh you down during your hikes. You can learn more here about the best fishing gear and customization options that suit your style and comfort. Most people use telescopic rods and spinning reels due to their collapsible design and versatility. Fishing Line: Opt for a fishing line that suits the conditions and target species in Las Vegas. Consider the line's weight capacity and choose a line that matches the type of fishing you plan to do. Tackle and Bait: Carry a selection of fishing tackle and bait that caters to the fish species found in Las Vegas waters. Research the local conditions or consult with experienced anglers to determine the most effective options. Buying Fishing Gear for Hiking and Fishing Adventures When purchasing fishing gear for hiking and fishing adventures in Las Vegas, keep the following factors in mind: Portability and Weight: Prioritize lightweight and portable fishing gear that won't burden your hiking trips unnecessarily. Look for collapsible rods, compact reels, and lightweight accessories you can easily carry in a backpack. Durability: Outdoor adventures involve exposure to various weather conditions and rugged terrains. Invest in gear made from durable materials such as graphite or carbon fiber that can withstand the rigors of your trip even in averse weather conditions. Versatility: Opt for versatile gear that can adapt to different fishing scenarios. Customization options, especially at meltontackle.com, are a good choice to go for. Consider ordering fishing rods with interchangeable tips or reels with adjustable drag systems. Research and Reviews: Before purchasing, research different options and read customer reviews. Online forums, websites, and outdoor gear retailers can provide valuable insights into the quality and performance of various products. Making Informed Decisions When Buying Fishing Gear Set a Budget: Determine and stick to your budget range. Remember, quality gear doesn't always have to break the bank. Find a balance between price and performance to ensure you get the most value for your investment. Seek Expert Advice: Visit local tackle shops or consult with experienced anglers to get personalized recommendations. They can provide valuable guidance based on their knowledge of the local conditions and the specific needs of hiking and fishing enthusiasts. Try Before You Buy: If possible, test out different options before purchasing. Attend outdoor expos or borrow equipment from friends to get a hands-on experience and determine which gear suits your preferences and style. Staying Safe While Hiking and Fishing in Las Vegas When it comes to staying safe while being outdoors in Las Vegas, always be aware of your surroundings. Pay attention to the terrain you're walking on, as well as any potential hazards that may be present. Ensure you have the proper gear for the activity you're engaging in, such as sturdy shoes or boots for hiking and appropriate clothing for fishing. Do not forget to carry plenty of water with you, as dehydration can be a serious issue in the desert climate of Las Vegas. It's also important to let someone know where you'll be going and when you plan on returning so they can check up on you if necessary. Finally, always carry a first aid kit with you just in case of an emergency. Conclusion The unique combination of hiking and fishing in Las Vegas provides an extraordinary outdoor experience for adventure enthusiasts. By understanding the essential gear choices, making informed buying decisions, considering the specific requirements of your adventures, and keeping in mind safety considerations, you can embark on memorable journeys through picturesque trails while enjoying the excitement of catching fish in the serene waters of Las Vegas. 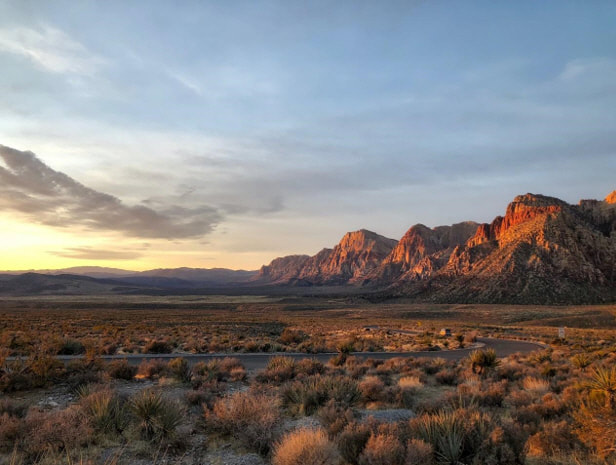 Figure 1 Hiking is an unforgettable experience. But you need to be prepared We all know why most people come out to Las Vegas. The bright lights and excitement of the entertainment capital are a major attraction for people from all over the country – and the wider world. The Vegas betting establishments are the best on the planet – if you like that sort of thing – and the casinos are always doing good business. We don’t have anything against the casinos of our home city. But we also know that there is a lot more to this place than just the tables and slots. The desert is a beautiful and vibrant region and one that is ideal for exploring by hiking. More people seem to be discovering this these days. But newcomers and experienced hikers alike should ensure that they are aware of the following safety tips before they head out. Be PreparedThis probably sounds a little vague. But hiking in the Nevada desert is not like other places in the country. The heat and the conditions can really get to you, so preparing well is a necessity.  Figure 2 You must keep hydrated when hiking WeatherDon’t be under the misconception that the heat is the only weather effect you could encounter on a hike in the desert surrounding Las Vegas. You should ideally be hiking in the early mornings to escape the worst of the heat, but make sure you dress in layers to deal with other temperatures as well. You should check the weather reports before you set out, but you need to know that there are monsoons in Nevada at certain times of the year – and that the weather can change suddenly in the desert. Again, most of the knowledge here will be in the preparation – but don’t head out thinking you are only likely to get hot. Water is Life We briefly mentioned this at the start, but we really can’t understate just how important hydration is for hiking in this area. You should really have at least a liter of water for every hour of a hike – but always take extra anyway. You never know when you might come up against unforeseen circumstances. You should also pack water in a cooler and leave it where you start and finish your hike. That way you can rehydrate immediately after returning. Hiking around Las Vegas is incredibly rewarding but you want to be able to enjoy it to the fullest. Preparing thoroughly is the best way to get the most out of the experience. We will cover hydrating and hydration in a moment, but there are other things that you absolutely need for a Las Vegas hike. You should bring sun protection – and that includes hats and sunglasses as well as sunblock to keep out those UV rays. But your feet will also need some looking after. Comfortable hiking boots will give you better traction on what can be dangerous terrain. You should also make sure you have maps, compasses and GPS equipment – and, ideally, already downloaded versions of your route to consult. Danger Signs The scenery of the desert surrounding Las Vegas is just stunning. But there are plenty of dangers in the sometimes desolate landscape. You can be prepared all you like, but make sure that you recognize the danger signs before it gets too late out in the sun and the heat. Nausea, cramps and headaches could all mean that you are suffering from heat exhaustion. Make sure you take in water and rest in the shade. Eating high-energy foods is good here too. A flushed face, confusion and dry skin could all mean heat stroke. This is incredibly serious and if you are with someone exhibiting these kinds of symptoms you should cool them down as quickly as possible. Try to get help as well, as hospital attention will be needed. Wild Animals Spotting animals in the desert is a thrilling experience – and one of the main reasons why many visitors decide to go on a hike in the first place. But you should also be aware that these creatures will be wild and many could be very harmful if they are not afforded the respect they deserve by a visitor – i.e., you.
The animals you encounter should not be dangerous unless they feel threatened but do keep your eye out for any movements in the brush. There are also rattlesnakes to consider. Again, they should keep out of your way, but do carry a first aid kit and include knowing what to do about a rattlesnake bite as part of your hike preparation.  It is important to know a vet you can trust your dog with because it will ensure that your pet receives the best possible care. A good veterinarian will be able to diagnose and treat any medical issues your dog may have and provide preventive care such as vaccinations and regular check-ups, which are essential today due to sneaky illnesses like heartworm, for example.
Additionally, having a vet you can trust means that you can ask questions about your pet’s health and get honest answers. This will help you make informed decisions about the care of your pet. Furthermore, if an emergency arises, having a familiar vet can make the situation less stressful for you and your pet. Knowing that your dog is in good hands with someone who knows them well can give you peace of mind. Here are the essential tips on how to find a good vet. Ask Your Neighbors Is it safe to say that word of mouth is one of the best ways to get straightforward advice these days. Asking your friends, co-workers or neighbors is a good place to start when searching for a vet that's right for you and your dog. If you live near Las Vegas, then ask around for a good local vet in Centennial Hills Nevada that has a reputation for excellent care and service. Once you get several recommendations, do some research to determine which option would be best for you and your furry friend. Read Online Reviews Reading reviews online can be a great way to find the best vet for your dog. By reading reviews, you can get an idea of what other pet owners think about the vet and their services. You can also learn about the quality of care they provide and if they are open after hours for emergencies. Also, you can read about how friendly and knowledgeable the staff is, and whether or not they are willing to answer questions or provide additional information. Furthermore, you can find out if the clinic offers any special services such as pet grooming, doggie daycare or overnight boarding. Finally, you can also read about how much experience the vet has with different types of animals and breeds. All of this information will help you make an informed decision when it comes to choosing a vet for your beloved pet. After all, your dog is always there for you. Having a great veterinarian to turn to in case of an emergency with your dog ensures that you will always be there for them. Around 59 million people in the United States go hiking yearly and that’s not surprising at all. Hiking is an enthralling outdoor experience that comes with a lot of benefits — nature exploration, physical activity, and connection with outstanding outdoors.
Whether you are a seasoned hiker or a newbie, it is essential to prep comprehensively for your next adventure. This guide can help you prepare everything you’ll need for your next hiking trip to ensure not just your safety but the best experience possible too. 1. Weather-Based Clothing Before going hiking, you need to consider the weather and the temperature. For instance, even on warm days, the temperature can drastically drop at some point at higher elevations or in the shade. Always have a lightweight, warm jacket or fleece with you to stay warm if the weather changes. To keep your hands, feet, and neck warm, think about packing gloves, a hat, and a neck gaiter. For any hike, rain gear is necessary, especially in regions where it rains frequently. Consider bringing an umbrella or poncho aside from having rain gear. If it's raining, wearing a waterproof jacket and a pair of pants will keep you dry and cozy. 2. First Aid Kit A first aid kit is an essential item for any hike. It should include basic things such as bandages, gauze, adhesive tape, pain relievers, tweezers, and scissors. Consider adding items such as blister treatments and insect repellent to your kit based on the conditions of your hike. Moreover, you must bring vital oral medications like an antihistamine, aspirin, pain relief medicine, rehydration salts, anti-diarrheal pills, and prescription medications. 3. Personal Hygiene Kit A personal hygiene kit should include hand sanitizer, a toothbrush, toothpaste, and toilet paper. Consider bringing wet wipes or a small towel for cleaning up after a long day on the trail. 4. Water and Hydration System Staying hydrated while hiking is critical, especially in hot weather. A hydration system is a convenient and hands-free way to stay hydrated while on the trail. Always carry enough water to last the entire hike, plus an extra bottle or hydration system. 5. Navigation Tools A map and compass are essential navigation tools for any hike. A GPS device is also a helpful addition, especially if you are hiking in unfamiliar territory. You can have wearables like smartwatches that have a navigation feature too. Warning and locating tools like a mirror or a fog stick in an emergency. A headlamp or flashlight is a must, especially when you hike in the early morning or late afternoon. Always carry a backup battery or power source for said electronic devices. 6. Fire-Starting Tools Bring fire-starting tools such as waterproof matches or a lighter in emergencies. If you plan to cook while on the trail, make sure to pack a small stove or campfire starter. 7. Multi-Tool A multi-tool or knife is a valuable item for any hike. It can be used for various tasks, including cutting rope, opening the packaging, and making repairs. You can also use this for prepping ingredients when cooking. 8. Shelter A lightweight, compact tent or tarp is a great option for overnight hikes. However, it is suggested to situation a temporary shelter in a safe space free from wild animals. This is why most hikers prefer buying high-quality tents to enclose and protect them at night. A bivy sack or emergency blanket can also be used for emergency shelter in case of unexpected weather changes. Try bringing electric warming blankets too. 9. Sun Protection Did you know that UV rays are intense at higher latitudes? A high-SPF sunscreen is recommended for maximum protection. Considering that, pack sunscreen, sunglasses, and a hat to protect your skin and eyes from sun exposure. Also, clothing gear for hiking is manufactured to filter UV rays. 10. INCH Backpack If you plan to go on a series of hikes where you will be gone for more than three days, then you need to bring an INCH backpack rather than just a bugout bag. The INCH Backpack is a term that may refer to a specific type of hiking backpack designed to carry the "10 Essentials" or "12 Essentials" of gear that every hiker should carry on the trail. The INCH Bag is likely designed to be compact, lightweight, and functional, with enough room to carry the essential items needed for a safe and enjoyable hike, such as water and hydration system, food and snacks, first aid kit, navigation tools, sun protection, warm clothing, rain gear, headlamp or flashlight, shelter, fire-starting tools, multi-tool, and personal hygiene kit. Why Pack Light and Complete? Packing light and complete for hiking is crucial to enjoying a safe and successful hiking experience. The essence of packing light for hiking is to carry only the necessary items required for the particular hike, avoiding excess weight that could slow you down and tire you out. On the other hand, packing complete means making sure that you have all the necessary items for the hike, including the water and hydration system, food and snacks, first aid kit, navigation tools, sun protection, warm clothing, rain gear, headlamp or flashlight, shelter, fire-starting tools, multi-tool, and personal hygiene kit. Key Takeaways In conclusion, the list of hiking essentials is a crucial guide for anyone who wants to embark on a safe and successful hiking experience. Whether you are a seasoned hiker or a beginner, having the right gear and knowledge can make all the difference in the world. So make sure to pack wisely, and happy hiking! When most people hear the words ‘Las Vegas’, their minds conjure images of the bright lights and the big city; in particular, the iconic Strip, with its palatial hotels and casinos, glittering billboards, gambling tables and crowded nightclubs where you can party into the small hours.
But the truth is that the area surrounding Las Vegas is just as much of a mecca for hikers and outdoor adventurers. In fact, Las Vegas boasts some truly awe-inspiring scenery, rugged landscapes, and hiking trails and rock climbs of varying levels of difficulty. If you are a keen hiker, or if you just love taking the opportunity to immerse yourself in nature and recharge your batteries, read on to discover some of the most breath-taking sites to visit while you’re in Las Vegas. Making Your Way To Vegas Millions of people fly to and from Las Vegas every year, with Harry Reid International Airport recently breaking the record for its monthly passenger numbers in June 2022. As a result, getting to Las Vegas won’t be a hard task. However, you can simplify your journey by making sure you pack everything you think you will need for exploring the hills and the back country. Some of the essential items you should bring are comfortable hiking shoes, sunscreen, hat, water bottle, backpack, camera, and a map or GPS device. You should also check the weather forecast before you go and dress accordingly. Las Vegas can get very hot in the summer and cold in the winter, so layering your clothing is a good idea. If you are flying in from Harry Reid International Airport (LAS), you can also save time and money by booking your airport parking with Enjoy Travel. Enjoy Travel has partner with reliable parking operators near LAS to offer affordable parking deals that include free shuttle service to and from the terminal. You can choose from self-park, valet park, or covered park options and reserve your spot online in advance. Secure A Safe Parking Spot As well as packing efficiently, you should also make sure you find low-cost secure parking near the airport you are flying from. Fortunately, Parkway Parking offers plenty of cost-effective options for you to choose from, so, for example, if you are flying from Fort Lauderdale, you can choose from a wide range of parking services. Experience Horticultural Delights At The Bellagio Once you have reached Las Vegas, you won’t have to go far to begin reconnecting with the natural world. The world-famous Bellagio is home to a 14,000sqft Botanical Gardens and an elegant glass-ceilinged Conservatory. The Gardens feature expertly prepared seasonal displays throughout the year, using living plants and blooms, and they are home to a beautiful array of trees, plants and flowers, cared for by 120 staff. You will also find a series of ponds, bridges and stately gazebos where you can pause to drink in the sights and smells of the plant life all around you in this unlikely haven. Explore Red Rock Canyon Situated just 17 miles from the bright lights and bustle of the Vegas Strip, you will find the wild majesty of Red Rock Canyon. The two destinations couldn’t seem further apart, but they are easily accessible from one another, so it won’t be long before you are surrounded by the rugged canyons, ramparts, gullies and rock chimneys that characterize this remarkable landscape. During your time in Red Rock, you can go on a scenic drive, or explore the canyons on foot or via bike. There are plenty of hiking trails to choose from, some more challenging than others. If you are keen to view the region’s ancient rock art, you can take the easy 30-minute Petroglyph trail, which brings you up close and personal with the Native American petroglyphs etched into a rock wall. These images are believed to be at least 800 years old and provide a fascinating window into the past. Venture Into The Valley Of Fire Consisting of 40,000 acres of red Aztec sandstone, interspersed with more somber grey and brown limestone, the Valley of Fire is a popular geographical and cultural attraction. Not only will you find an array of fascinating geological features, but you will also be able to admire centuries-old petroglyphs left etched into the rock by both the Basketmaker culture and the Pueblo who first inhabited this land centuries ago. You should also look out for legendary geological features such as the Mouse Tank, named after a Southern Paiute, Little Mouse, who tried to evade capture by hiding in the canyon after murdering two prospectors. As well as exploring the hills and canyons under your own steam, the national parks offers a range of events for you to take part in throughout the year. These include nature talks and astrological events, including full moon hikes and even meteor viewings. Take A Trip To Death Valley If you don’t mind taking a two-hour drive, you can pay a visit to one of the world’s most awe-inspiring locations, renowned for its searing heat, twisted rock formations, billion-year-old stone, and unique species of wildlife. Of course, if you’re planning an excursion to Death Valley, then you need to make sure you come prepared. Bring plenty of water, as the temperatures here in summer can easily reach over 100 degrees Fahrenheit. You will also need to wear appropriate clothing, including hats to shield your head from the blazing sun. While you are exploring the Valley, be sure to check out some of its most remarkable features, such as the mysteriously moving stones at Racetrack Playa, and the Devil’s Golf Course (which isn’t a real golf course at all, but an astounding geographical phenomenon). You can also marvel at the volcanic crater of Ubehebe, and drink in the spectacular sunset views from Zabriskie Point. This may surprise you, given the arid nature of the landscapes here, but Death Valley is home to an array of fauna and flora – so if you’re a keen birdwatcher or just love searching for wildlife or unusual plant specimens, this is a great place to indulge your passion. Be sure to watch out for desert bighorn sheep nimbly ascending the slopes, as well as kangaroo rats and, of course, both coyotes and road runners. Final Thoughts While Las Vegas is undeniably a fun place to visit if you want to enjoy world-class entertainment, the thrill of a gamble, and luxurious accommodation, it can also offer a window to some of America’s most unspoilt and majestic landscapes. So, if you are keen to explore the wild beauty of the arid canyons, soaring cliffs and history-etched hills surrounding Sin City, it’s time to start planning your perfect trip. The hardest part will be choosing which unforgettable natural attraction to visit first. Las Vegas is known for its world-class nightlife, casinos, and entertainment. From watching the Bellagio water show to catching a Las Vegas Raiders game at Allegiant Stadium, there is no shortage of fun things to do. However, if you find yourself looking for something new and exciting and want to venture off the beaten path, we’ve got you covered.
Redfin reached out to locals, including us, to share our favorite hidden gems in Las Vegas. So whether you’re already living in Las Vegas, considering renting an apartment in Paradise, NV, or are just a tourist for the week, venture away from the strip and try these exciting places. As the saying goes, “What happens in Vegas stays in Vegas,” so you’ll want to keep these places a secret. Check out Hidden Gems in Las Vegas: Sin City’s Best Kept Secrets. Las Vegas, often referred to as Sin City, is widely popular as a tourist destination worldwide due to its immense popularity in pop culture and mainstream Hollywood. There are several great things to do in Vegas, and its popular sites are what bring close to 40 million visitors to the city every year. While Las Vegas is primarily known as a gambling, shopping, and nightlife district, there is much more to explore in the Sin City, and visitors can find comprehensive guides for the same at Vegas Freedom. If you are visiting Las Vegas anytime soon, given below are the top three things you should be looking forward to that do not involve a casino: 1. Go hiking at the Red Rock Canyon Las Vegas has much more than party potential, and if you are in Las Vegas, you should be looking to explore the whole of Nevada too. The Red Rock Canyon National Conservation Area is a few miles off Las Vegas within the Mojave Desert. It is breathtakingly beautiful and offers a stunning array of plants and wildlife. The Canyon features a couple of trails such as the Calico and the Ice Box. The Calico Tank Trail is a 2.2 miles long trail in the Canyon which takes about 2 hours to complete and has beautiful sandstone formations along the way. The Ice Box Canyon Trail is a truly unique one since despite the Canyon being very hot, the trail is comparatively cooler as this part of the canyon doesn't get too much sun. The Ice Box trail is 2.3 miles long, takes about 2 hours to complete, and features seasonal waterfalls along the way. If you have a dog, checkout the: Best hiking trails for dogs. 2. Go see the fountains of Bellagio The fountains of Bellagio are a stunning part of the Vegas Strip. The signature dancing fountains are composed of more than 1200 geysers, nestled together in approximately an eight-acre lake in front of the Bellagio resort. During the afternoon, visitors get to see the mountain erupt every half-hour and in the evening it erupts every 15 minutes or so. The fountains initially gained popularity through the Hollywood feature film Ocean’s Eleven. The fountains are set to music, and make a truly beautiful spectacle for everyone to witness. The fountains are free to watch for onlookers, resort guests, restaurant-goers, and any visitors alike. 3. Visit the National Atomic Testing Museum During the 1950s, while residents of Las Vegas could be seen strolling alongside the strip, one could witness atomic clouds looming over the horizon. The history of the American nuclear testing program is both bizarre and yet awe-inspiring, and the National Atomic Testing Museum covers it in detail. The museum itself is home to the Silo Museum and the Ground Zero Theater. While the Silo Museum features a short film about the atomic test site in Nevada, the theater is a multi-sensory experience that explains the entire history of atomic testing. The National Atomic Testing Museum features multiple exhibits including radio badges, nuclear testing artifacts, artifacts from the Manhattan Project, and whatnot. Conclusion The fact that Vegas is almost always thought of as a partying destination is almost cliche, and it is high time that this image changes. Nevada and Las Vegas have a lot more to offer than casinos, and rightly so, visitors should be thinking of Vegas in the same light. Over the last few years playing online casino games has increased in popularity and even though the hospitality industry has opened up again there are many people who have decided to remain online to source their favorite game. This popularity can be attributed to a number of reasons which we shall do our best to answer below
Convenience is The Name of The Game Modern life is busy no matter what we are doing. Sometimes there doesn’t seem to be enough hours in the day to complete what we set out to do, so a lot of the time playing a few games is the furthest thing from our minds. Luckily, playing at an online casino is easy, it doesn’t matter which games you prefer, as long as you have an internet connection you can access them all from the comfort of your own home, whilst commuting to work, in your lunch break, in fact, from just about anywhere you choose. Another convenient aspect of the online casino is that there are no time restrictions to when you can play. Enjoying your games whenever and wherever you happen to be tick all the boxes for many people, and if you would like to see for yourself what a high-end online casino looks like try visiting fruityking.co.nz where you can find out everything you need to know to becoming a fully fledged member of one of the best NZ online casinos today. Great Games With Top Software Fully optimized for your mobile devices you can expect to find a wide range of new slots and online pokies, live casino action*, jackpot games, video poker as well as all the popular table games like roulette and blackjack in many variations so you will never be lost for something new to try. *Live online games are about as close as you can get to actually walking through the doors of a bricks and mortar casino. Streamed to your own screen games take place in real time and are hosted by a real-live human being. You can chat with your dealer and other players sitting at your table in-between games via the chat function supplied, commiserating on any losses and congratulating each other when there is a winning streak.’ Not only does an online casino like Fruity King have a great selection of games to choose from, the quality of those games is second to none as they have been developed by some of the best software providers. Enjoy the latest video slots which have you playing for massive jackpots from names like Microgaming, NetEnt, Big Time Gaming and Barcrest amongst others no matter what game you choose to play you know that you will be in for a fully immersive and entertaining experience. Take a Bonus Competition between online casinos is fierce and this has led to some generous bonuses and promotional offers to entice you through the virtual doors. Bonuses are a great way of boosting your bankroll allowing you to try games you may not have considered. But remember to read all the terms and conditions that apply to a bonus or promotional offer before opting in just to make sure that it suits your own requirements. Legitimate and Fully Licensed Gone are the days where online casinos had a rather shady reputation. Now, online casinos need to be fully licensed by a reputable Gambling Commission and/or Gaming Authority and have become a legitimate and common source of entertainment. Of course, you should always check the online casino you are considering playing at just like you would any other site where you might spend some of your own hard-earned cash but once you have checked the validity of a site you can expect to play in an environment that is both safe and secure. Many people are interested in coming to Nepal. This is a fantasy-filled country that is very famous for its scenic views, temples, monasteries, monuments, heritage buildings, etc. There are a lot of interesting things that you can do in this country. Before you come to this country, you have to plan everything in advance for getting the best experience in this country. The best season to come to Nepal is around the fall season. This season will last from October to December. The weather during this fall season will be perfect for you who want to do some adventurous things in Nepal.
1. Everest Base Camp Trek with High Passes The Everest Base Camp Trek is very famous among many tourists who are coming to Nepal. This trek will take you to more than 5000 meter passes. Coming to this place will be the best experience for you who want to enjoy the true experience of the Everest region. If you have about 3 weeks on this trail, you will get access to the best views of this trek. When you are trekking on this trail, you are going to enjoy spectacular views of the Himalayas, especially when you are crossing the Cho La, Renjo La, and also Kongma La passes. 2. Enjoy the beauty of the Kathmandu Kathmandu is the capital city of Nepal. This city is very famous for some interesting buildings, such as monuments, medieval temples, public squares, monasteries, etc. You can take a full-day or a half-day tour in this city. Some highlights of this city are Boudhanath, Pashupatinath temple, Kopan monastery, Durbar square, Thamel area, and also Dakshin Kali temple. The Thamel area is very well-known for its entertainment. It will be the best place for you who want to buy gifts from Nepal. 3. Visit the Chitwan National Park Chitwan National Park is believed to be one of the most popular destinations in Nepal. There are more than 500 species of migratory birds that you can find in this place. Some popular animals in this national park are one-horned rhinos, Asian elephants, and also Bengal tigers. This national park covers around 330 square miles. It is recommended for you to explore the Chitwan National Park by going for a three-day trip. You can stay for 2 - 3 nights at one of the most popular hotels in Chitwan. 4. Explore Pokhara There are many people who are interested in coming to this place. Pokhara is a lakeside town that attracts all nature lovers, explorers, and also adrenaline junkies from all around the world. You can do some interesting activities, such as mountain biking, fishing, river rafting, etc. When you are in this area, you can explore some interesting treks, such as Annapurna Base Camp, Poonhill, Annapurna Circuit, etc. If you love doing some outdoor activities, you can come to this place. You can do some interesting activities, such as canyoning, paragliding, bungee jumping, and even sunbathing. 5. Mountain Biking in the Kathmandu Valley You will never get the same incredible experience in other places in the world. One of the most challenging biking excursions will be available in the Shivapuri National Park. You will enjoy the dirt roads that are from the Budhanikantha entrance. There are some other interesting options that you can explore, including the Bungamati, Godavari, and also Chapagaun roads. They are very famous for their beautiful and also easy trails. 6. Take the Mount Everest Helicopter Tour When you are in Nepal, you should never forget to try this interesting activity. A helicopter tour around Mount Everest will give you an incredible and breathtaking view. This tour will let you get closer to the traditional Himalayan cultures. You can enjoy the beauty of the majestic peaks from Mt Ama Dablam, Mt. Cho Oyu, Mt Pumori, etc. It is a good idea for you to stay around the Kala Patthar. This place is famous for its 360-degree panoramic views of the fascinating mountains around the Nepal area. 7. Visit the Pashupatinath Temple It is one of the most important Hindu Temples in Nepal. This temple is specially designed with a classic pagoda style, four silver-plated doors, glided rooftop, and also carved rafters. When you are visiting this temple, you can see a glimpse of Lord Shiva’s bull called Nandi from the western entrance area. You will enjoy the beautiful traditions of the Hindunese people in Nepal. There are many other interesting things that you can do when you are in Nepal. If you want to explore the beauty of this country, you can take a tour that will bring you to some of the most popular places in the Nepal area. Don’t forget to choose the best hotel where you are going to stay when you are in this country. |
AuthorBranch Whitney is the author of Hiking Las Vegas and creator of the 52 Peak Club where members hike to the best 52 Peaks around Las Vegas, NV Archives
October 2023
Categories |
 RSS Feed